R6 Installation Guides
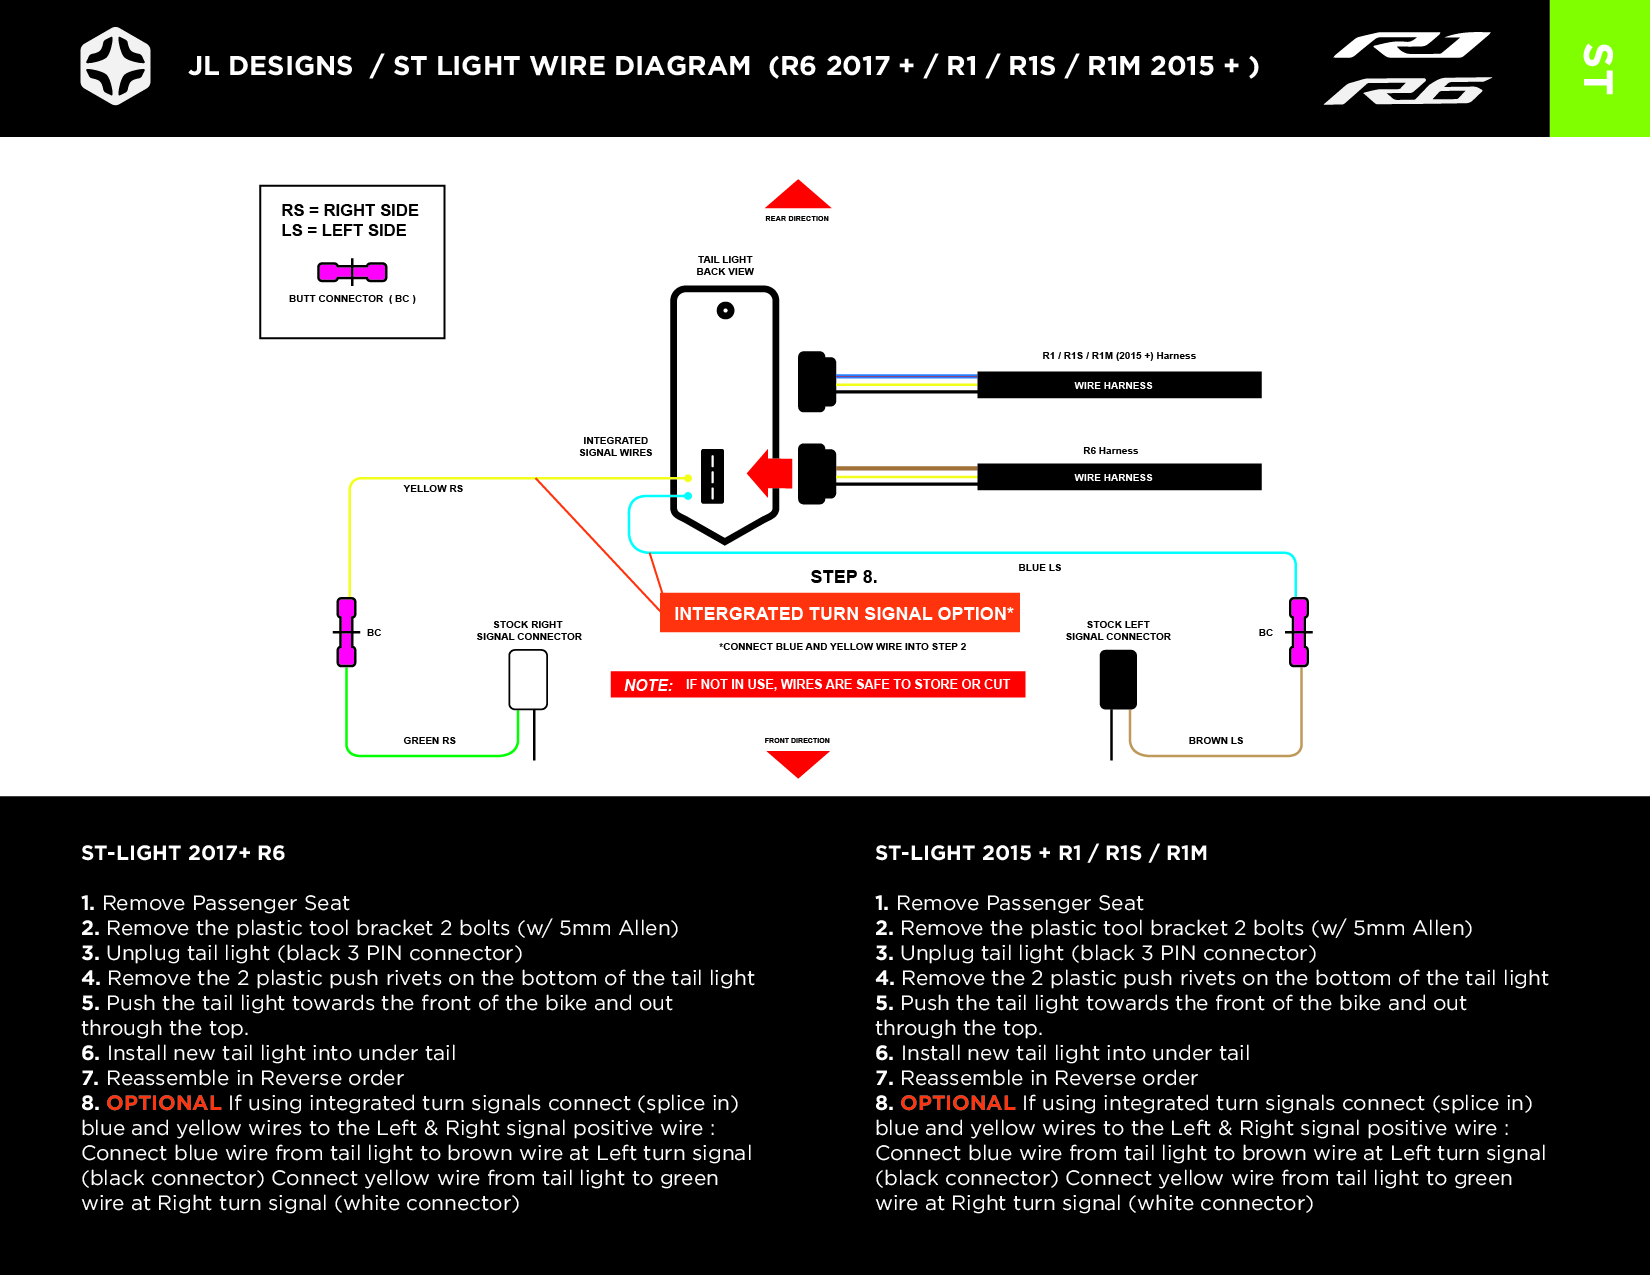
1. St-Light (integrated tail light)
2. fender eliminator direct plug-in
3. ts-Series SIde lights (single function side lights)
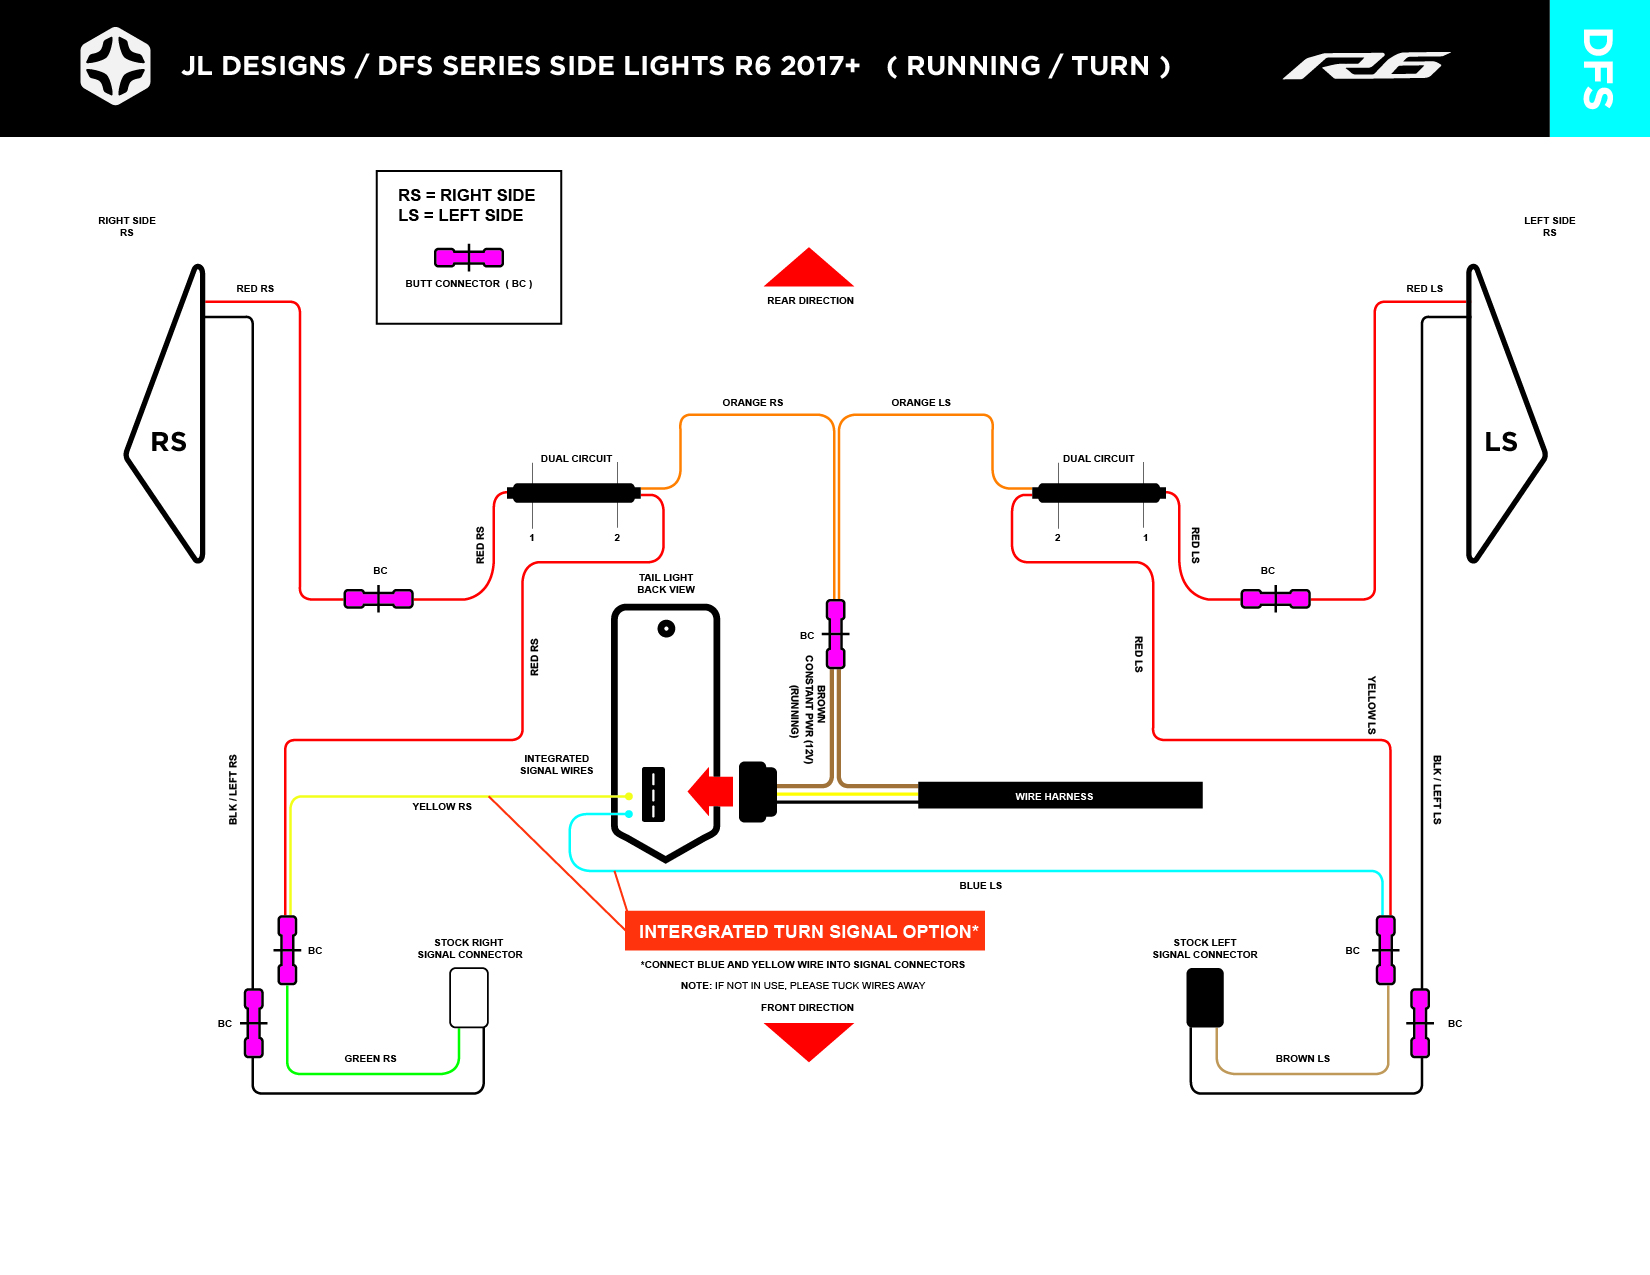
4. DFS-series side lights (dual function)
- running / brake
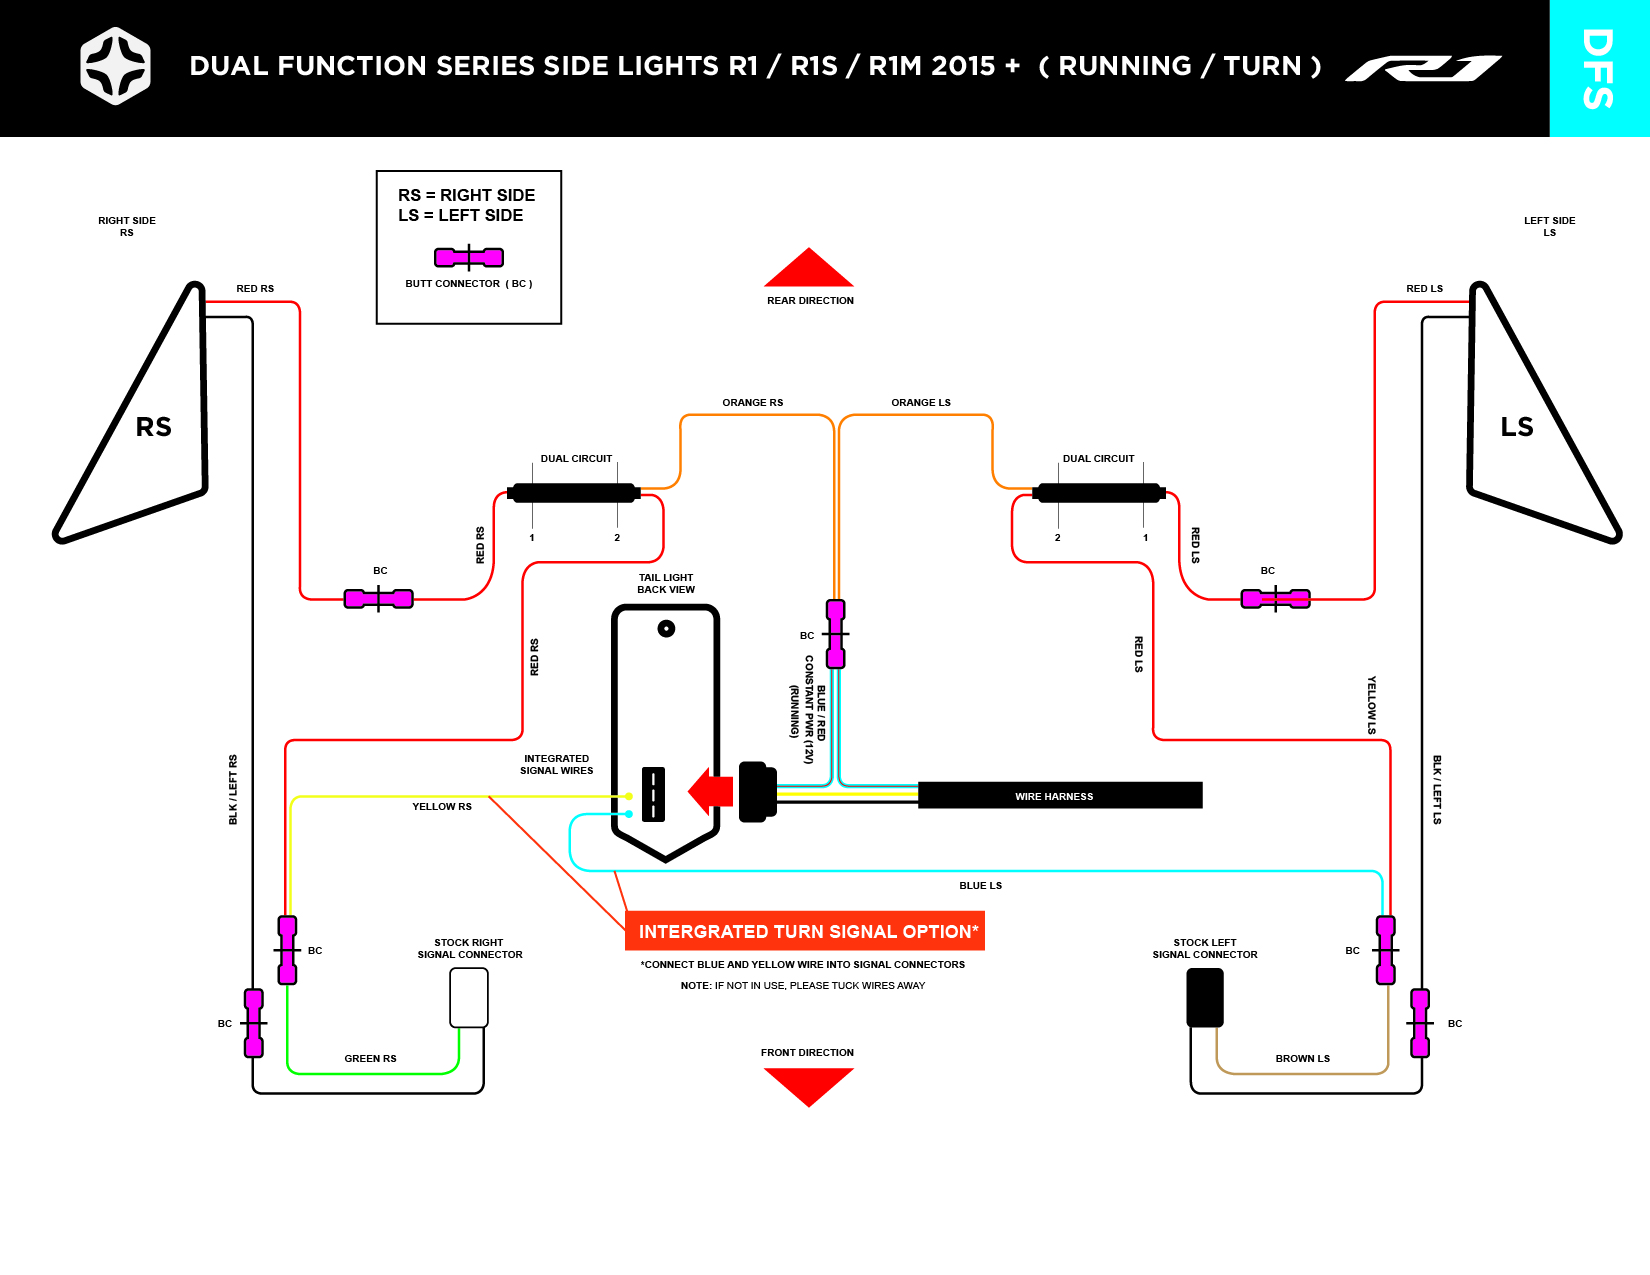
- running / turn signal
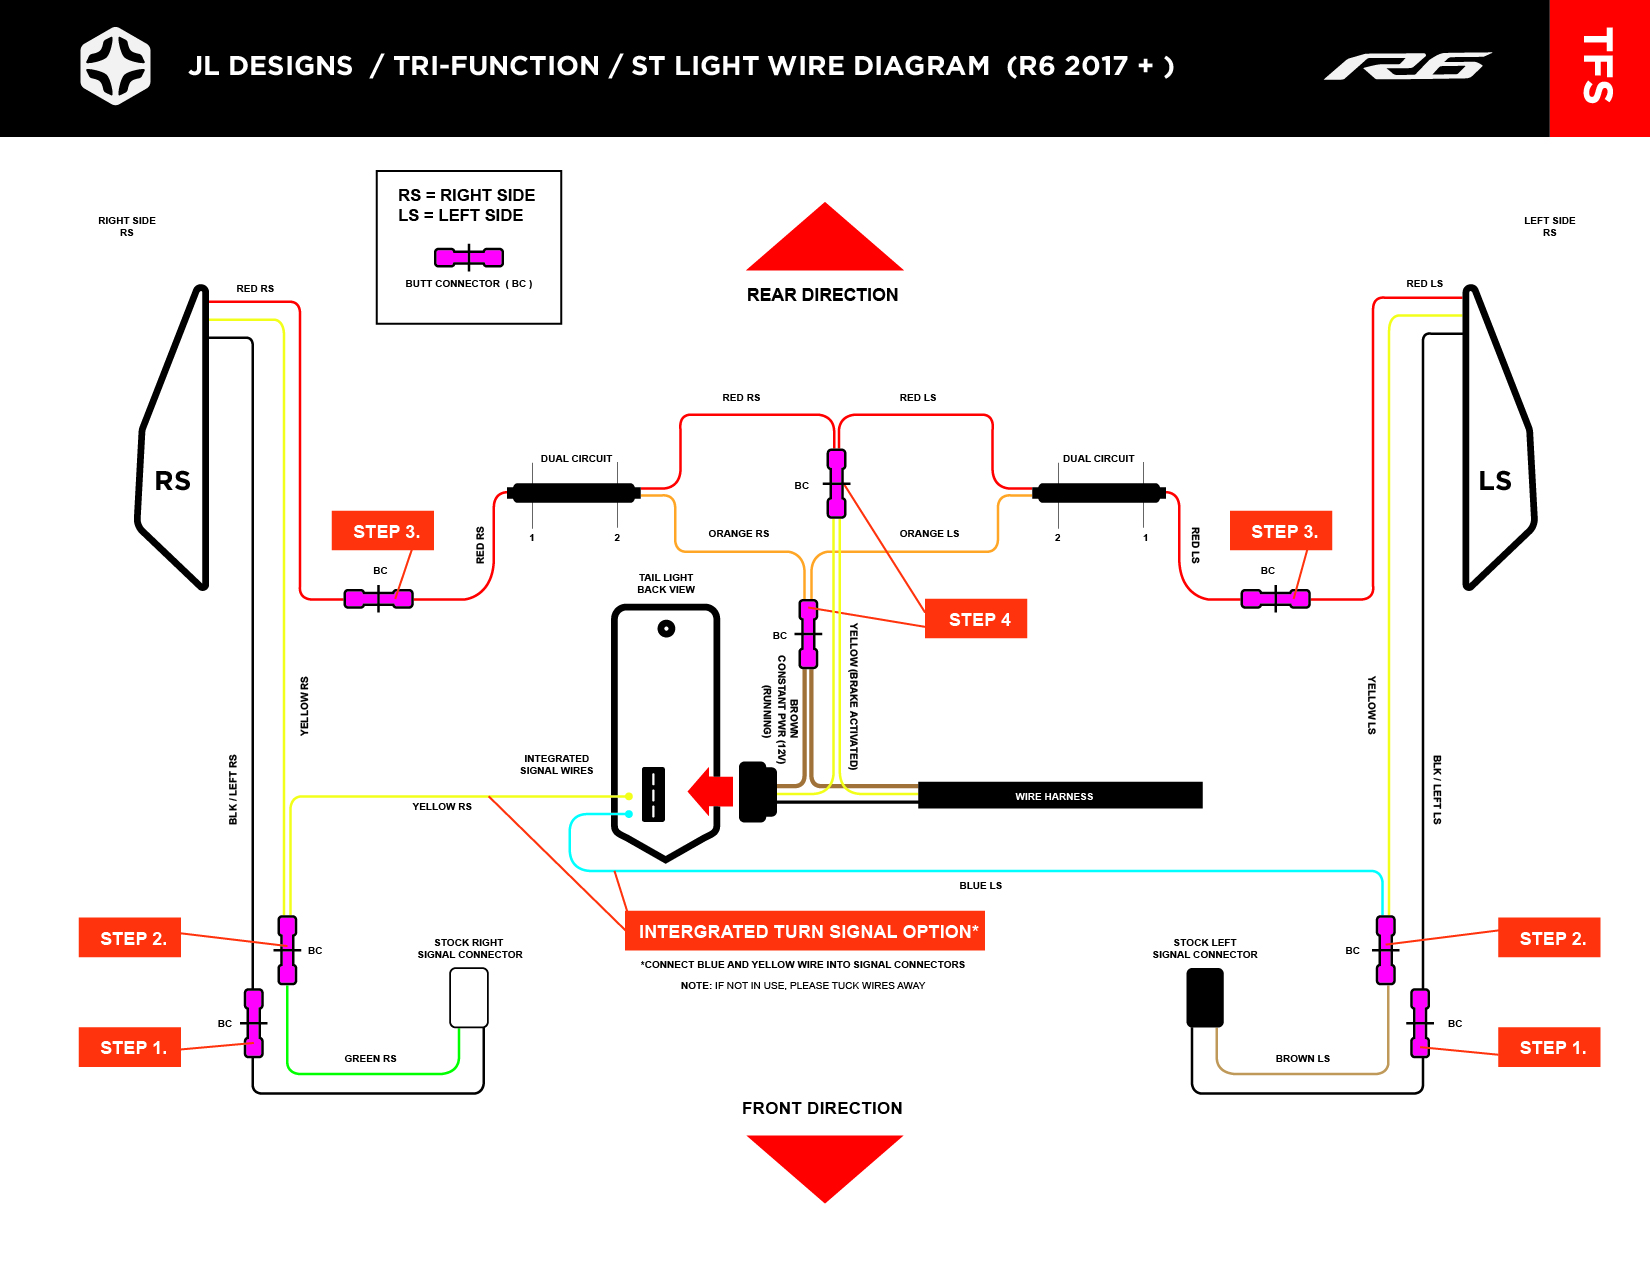
5. tfs-series lights (tri-function)
R7 INSTALLATION GUIDES
R1 installation guides
1. st-light (integrated tail light)
2. fender eliminator direct plug-in
3. ts-Series SIde lights (single function side lights)
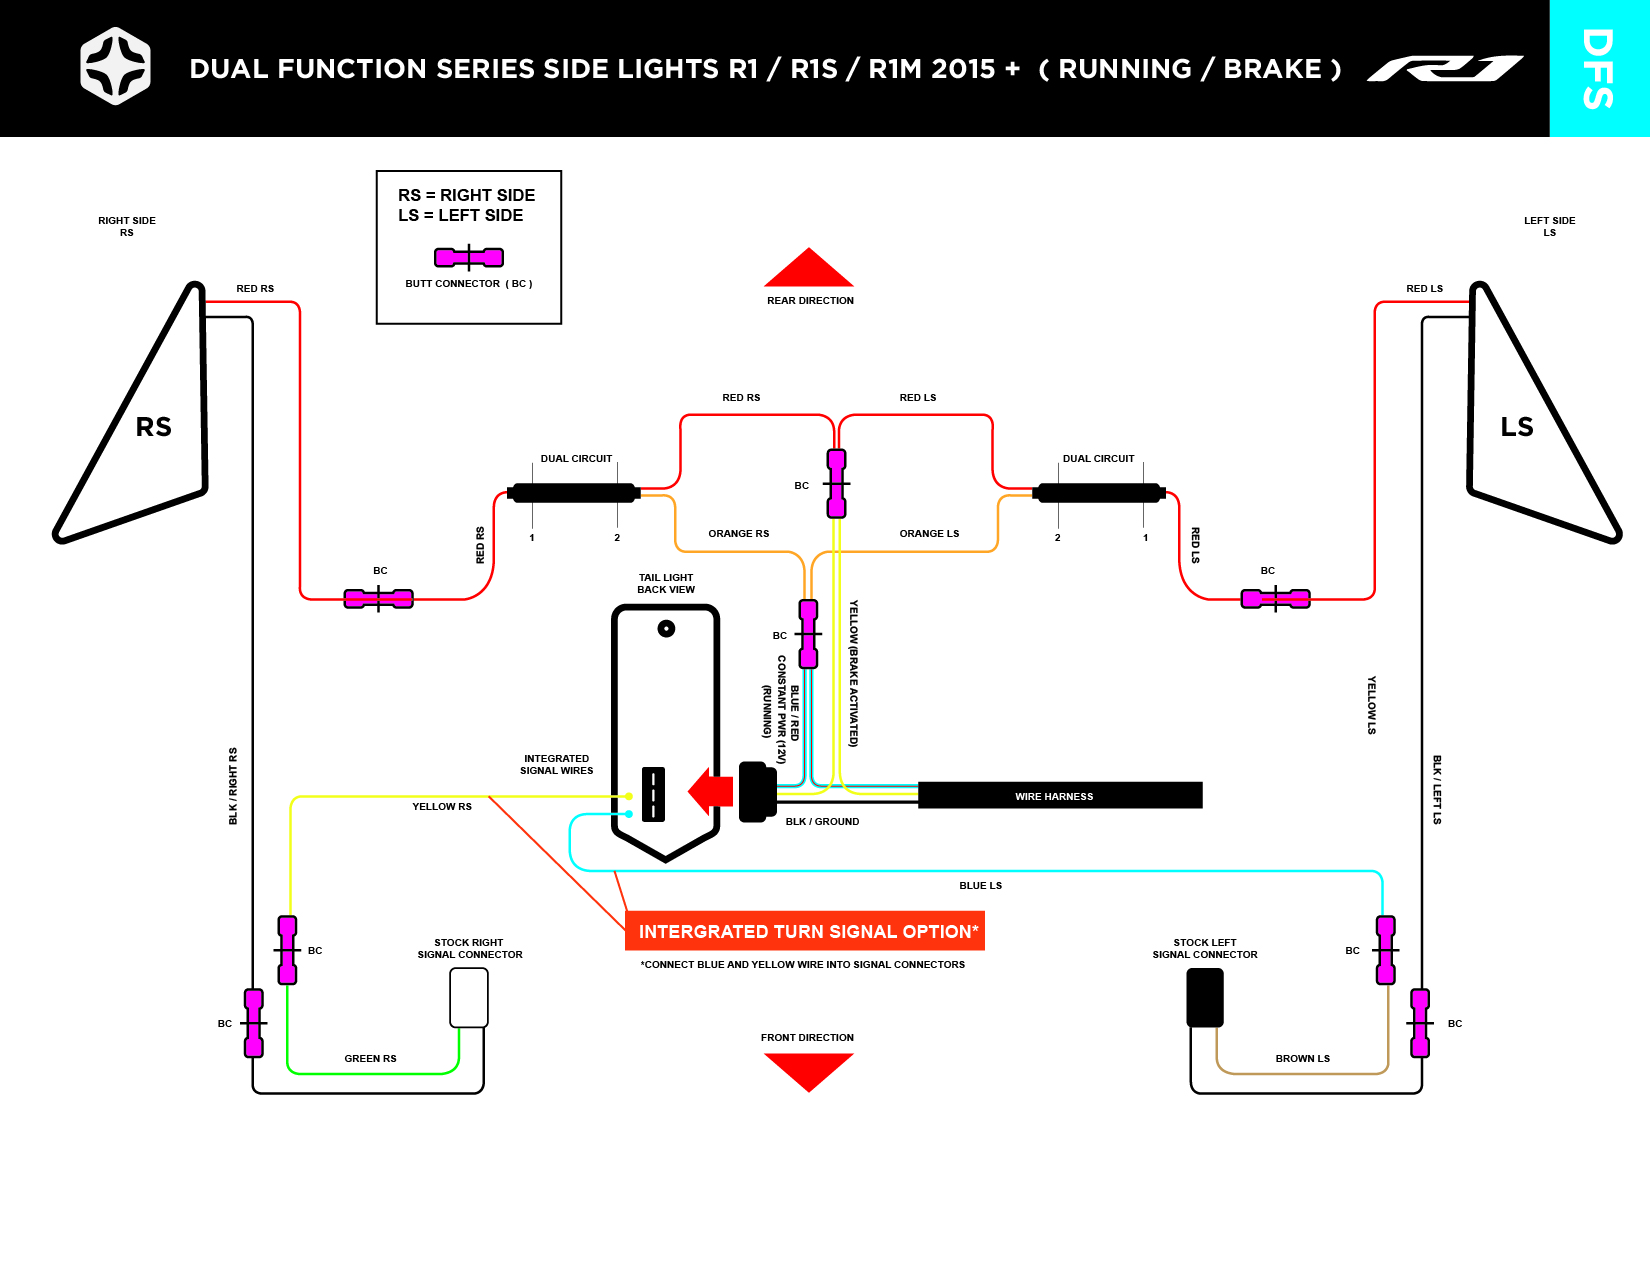
4. DFS-series side lights (dual function)
- Running / brake
- running / turn signal
5. tfs-series lights (tri-function)
BMW S1000RR 2020+ INSTALLATION VIDEOS
Aprilia RS660
SUZUKI Hayabusa
1. FENDER ELIMINATOR
Fender Eliminator install - Youtube
Installation Wiring Guides
Use The diagramS Below to wire your new JL kits: R1 kits (scroll down)
R6 install directions in text format below. A how-to install video is being made and will be up soon.
ST-LIGHT 2017 R6
1. Remove Passenger Seat
2. Remove the plastic tool bracket 2 bolts (w/ 5mm Allen)
3. Unplug tail light (black connector)
4. Remove the 2 plastic push rivets on the bottom of the tail light
5. Push the tail light towards the front of the bike and out through the top.
6. Install new tail light into under tail
7. Reassemble in Reverse order
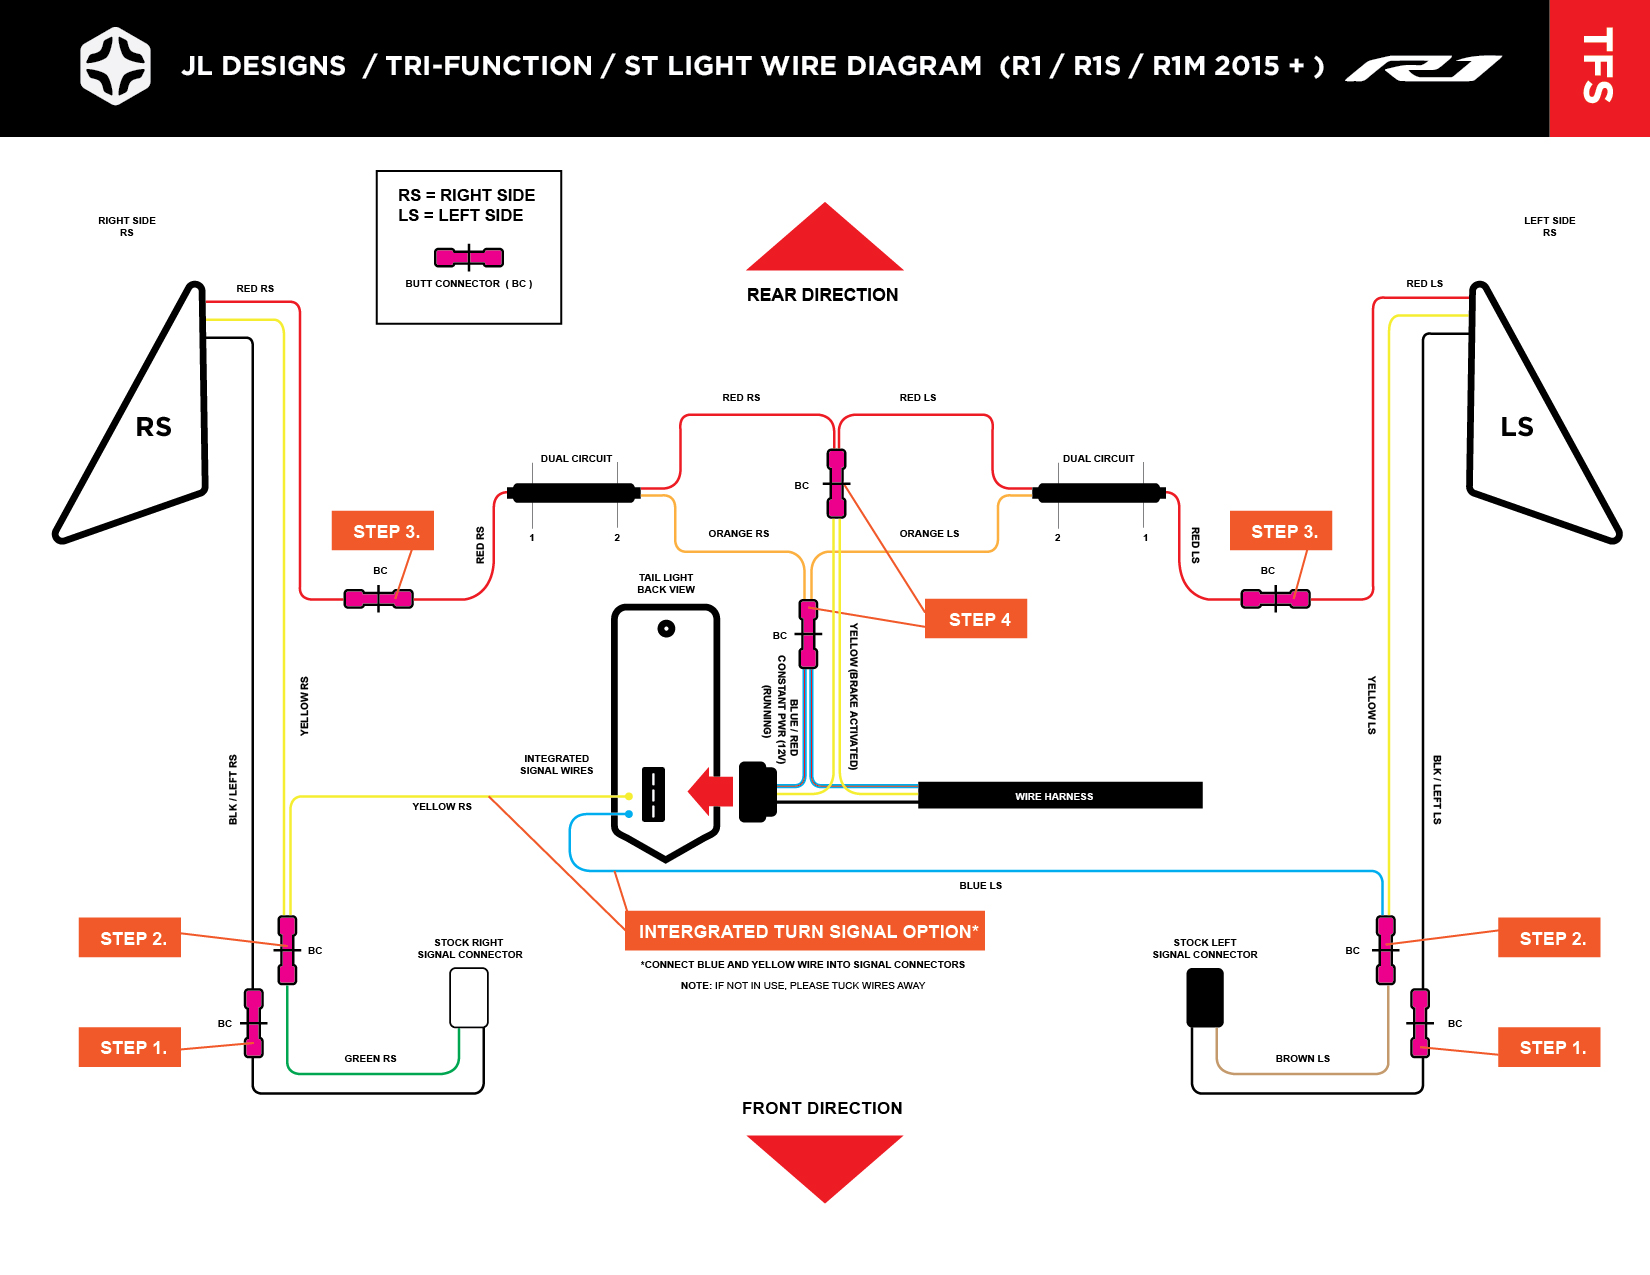
8. If using integrated turn signals connect (splice in) blue and yellow wires to the Left & Right signal positive wire : Connect blue wire from tail light to brown wire at Left turn signal (black connector) Connect yellow wire from tail light to green wire at Right turn signal(white connector)
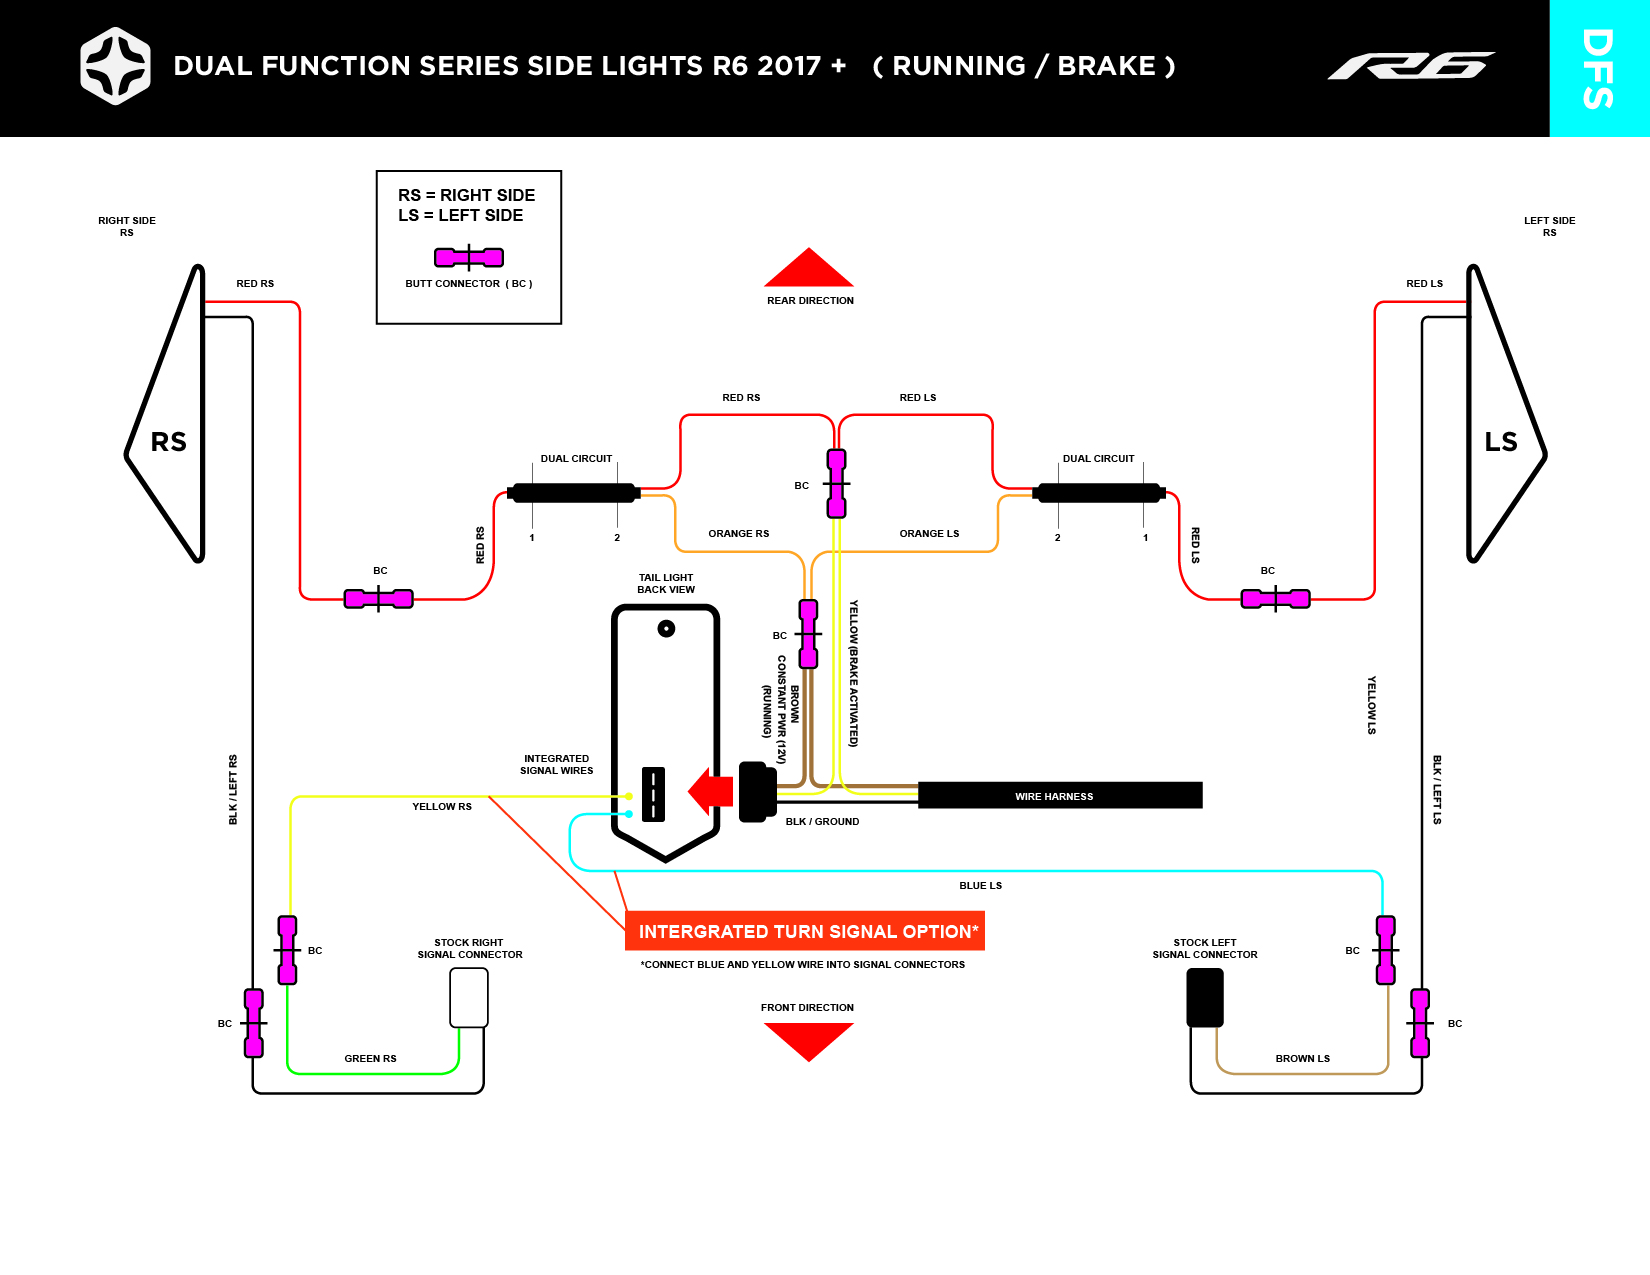
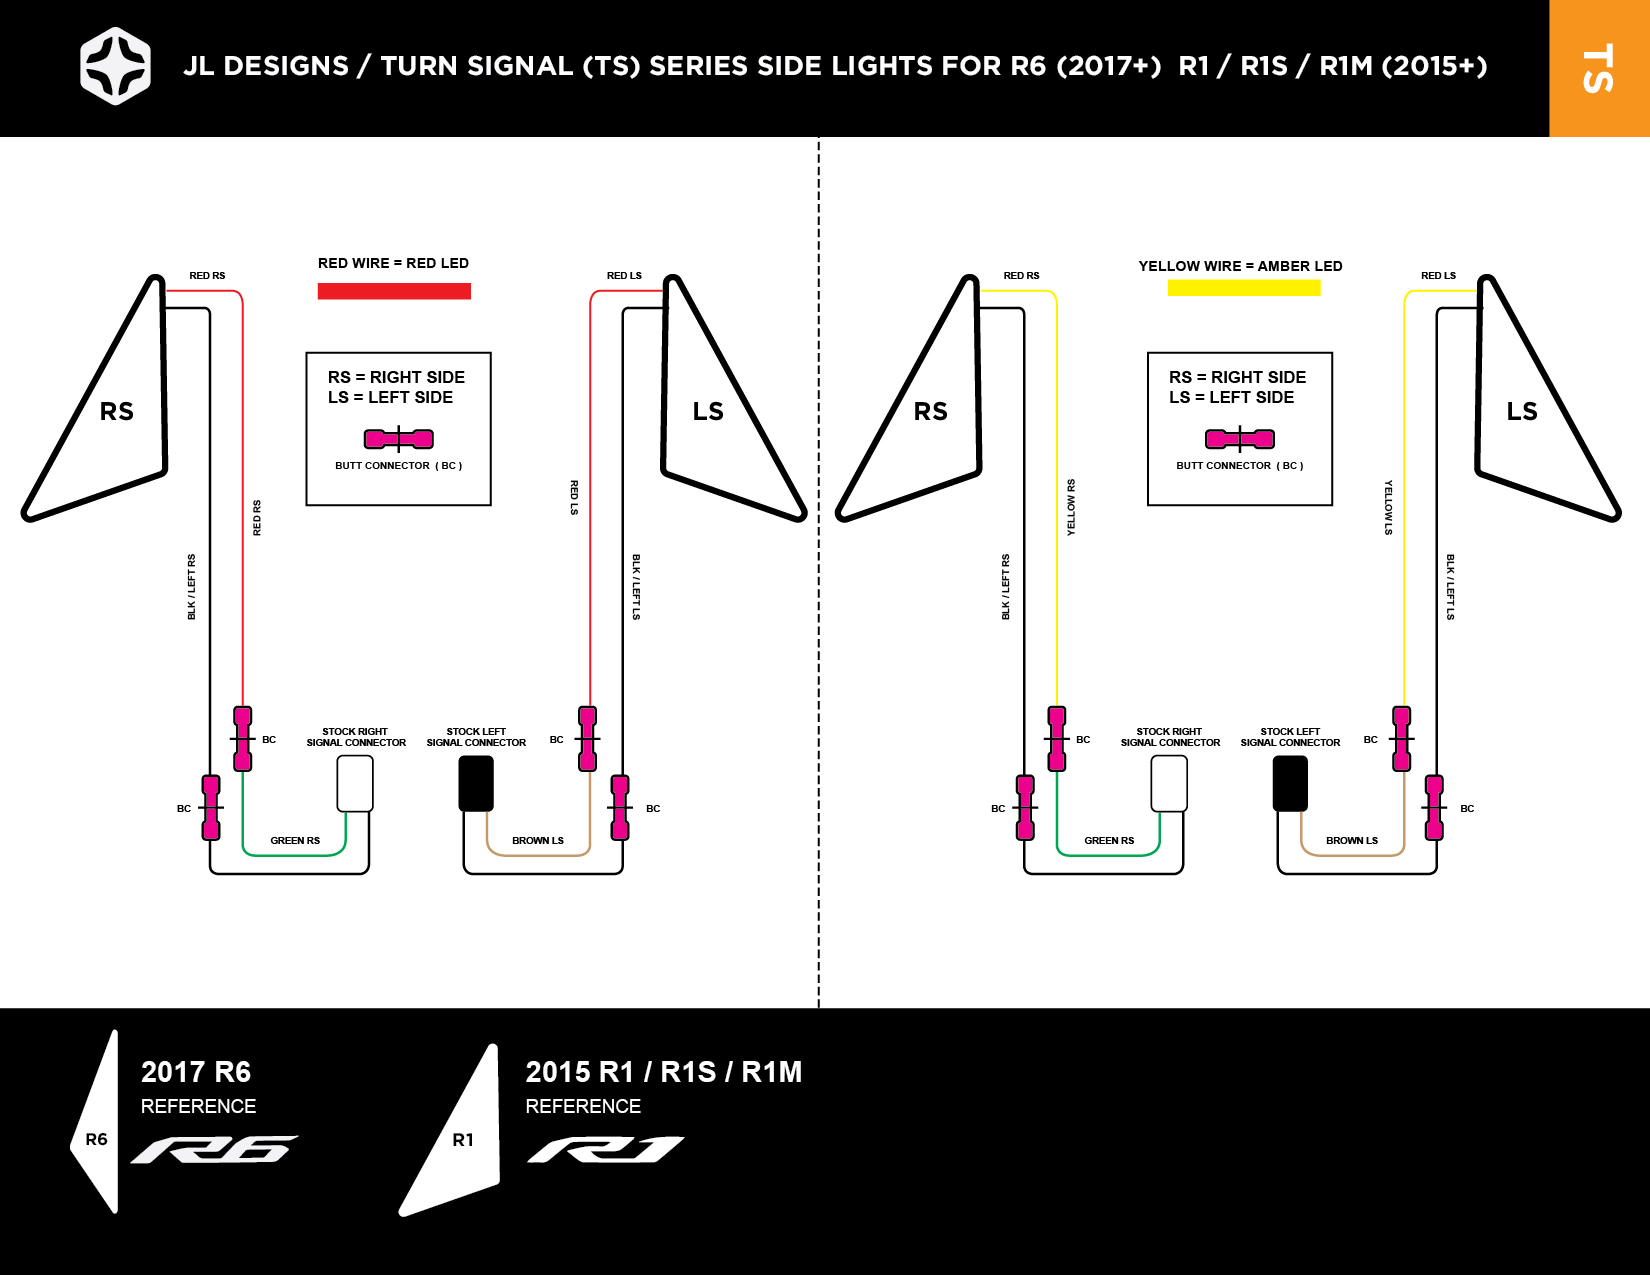
TS / DFS Turn Signal lights -
Remove the tail light for easier wire access: Follow the above directions on how to remove the tail light
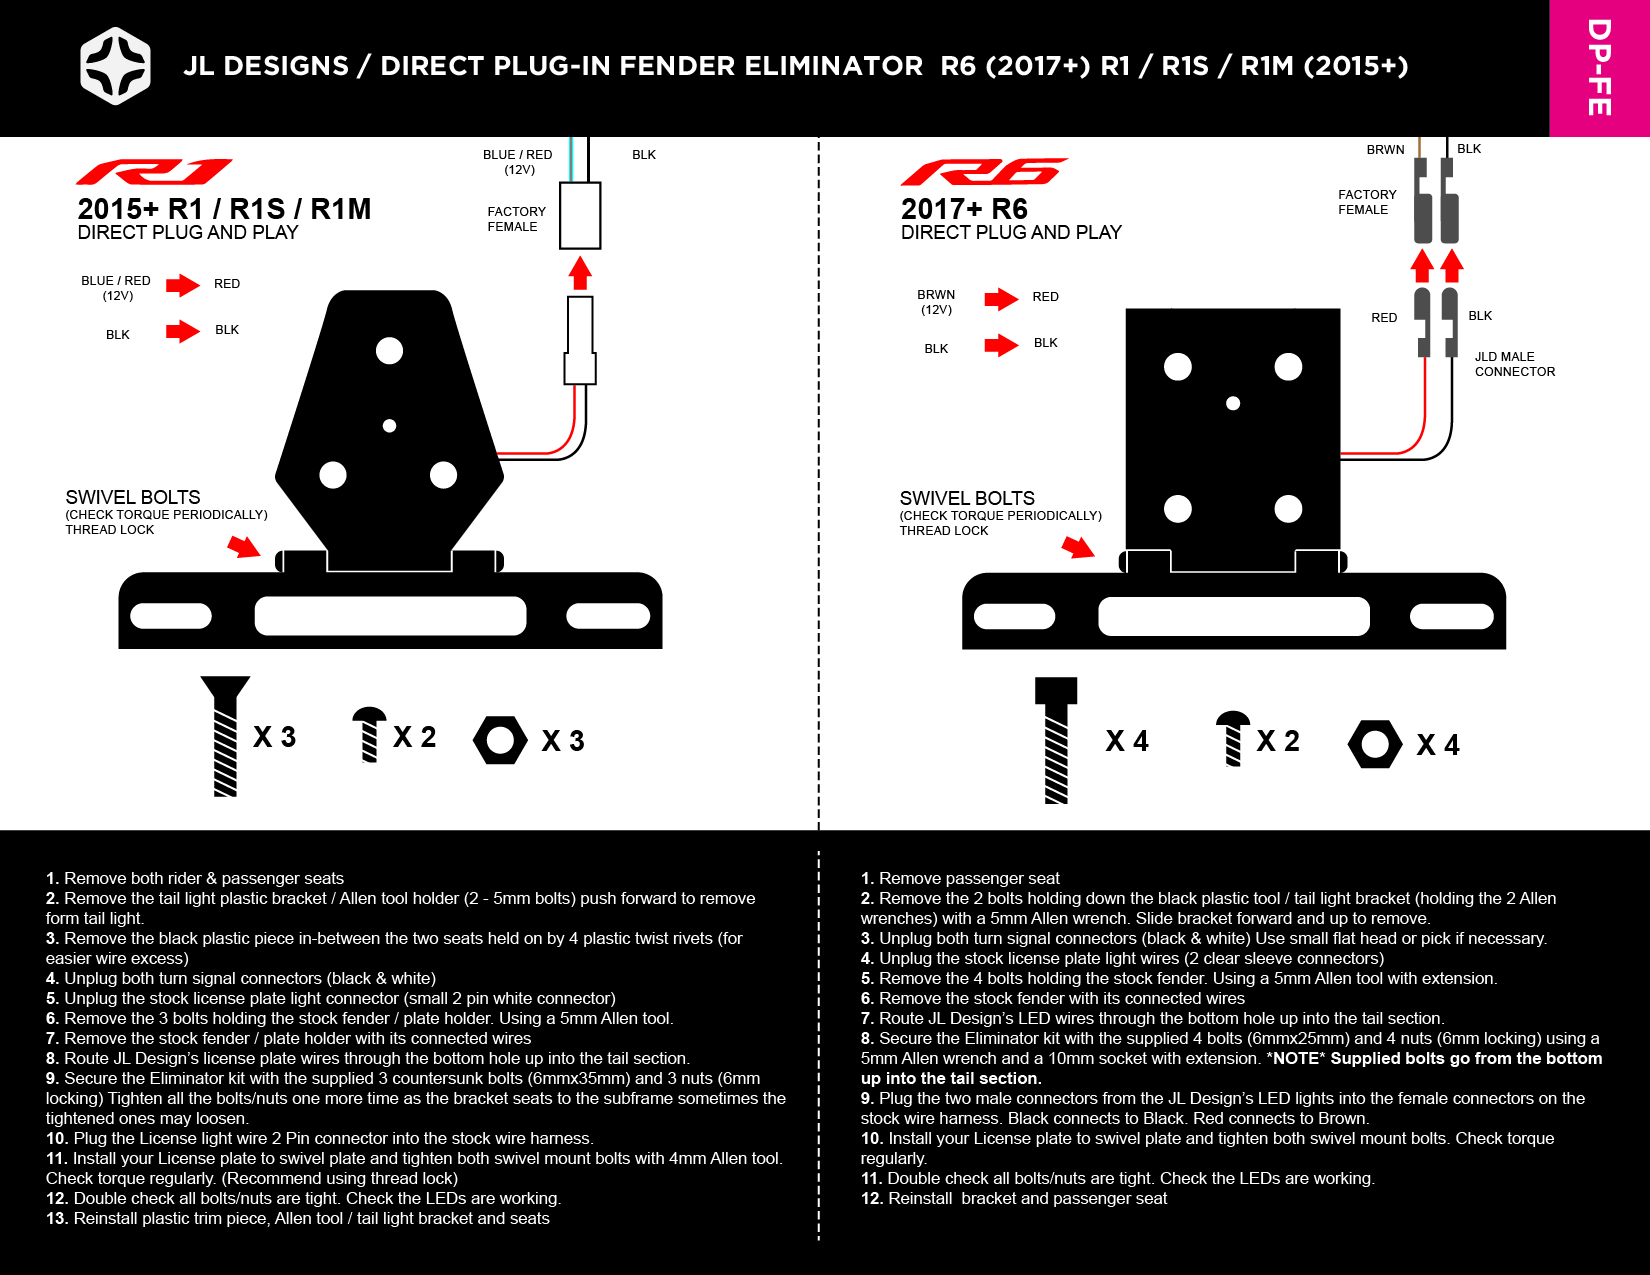
Unplug the turn signal connectors (White & Black) along with the license plate 2 clear sleeve connectors
Remove the 4 (5mm) Allen head bolts holding the stock license / turn signal bracket. Pull bracket down while guiding the wires through the hole in the tail section
Drill a 2-3 mm hole into the undertail 3-5mm back from rear point of the fin (closest to the tail light)
5. Route LED light wires through the newly drilled holes back near the wire connectors
6. Wipe clean the plastic fin prior to applying (we recommend rubbing alcohol)
7. Remove Adhesive backing, install by aligning the light with the fin edge and press down firmly
8. Wire in the turn signals. White connector is Left signal, Black connector is Right signal
9. TS-SERIES: Attach the 2 black wires to the stock signal ground wires (black) connect (splice in) the yellow wires: Left & Right signal positive wire : Connect Left YELLOW wire from LED signal to brown wire at Left turn signal (black connector) Connect Right YELLO wire from LED signal to green wire at Right turn signal(white connector) We always recommend soldering and shrink wrapping all connections.
10. DFS-SERIES: If wiring for Dual Function on the LEDs see supplied wiring diagram to see how to hook up a single function LED to a Dual function.
11. Reinstall parts in reverse order to complete the job.
Thank you! Please look out for our Fender plugs and Eliminator brackets on our website.
email: info@jld7.com with any concerns or questions.